

Demystifying the O2 Sensor Heater Circuit (Bank 1, Sensor 1) and its Impact on Performance
Key Insights on the P0135 Code
- Crucial Heater Function: The P0135 code signals a problem with the heater circuit in your upstream oxygen sensor (Bank 1, Sensor 1), which is vital for the sensor to reach operating temperature quickly, ensuring precise air-fuel mixture control right from startup.
- Subtle Symptoms, Significant Impact: While you might not notice immediate driving issues, ignoring this code leads to reduced fuel efficiency, increased emissions, and potential long-term damage to expensive components like the catalytic converter.
- DIY-Friendly Diagnostics: Many common causes, such as blown fuses, damaged wiring, or a faulty sensor heater element, can be identified and often resolved at home using basic tools like an OBD-II scanner and a multimeter, saving you time and money.
The dreaded check engine light can cast a shadow over any driver's day. When an OBD-II scanner reveals a P0135 code, it points to a specific issue: a malfunction in the heater circuit of your vehicle's upstream oxygen sensor on Bank 1, Sensor 1. While this might sound like a complex technical problem, understanding the P0135 code is actually quite straightforward. Addressing it promptly is key to maintaining your vehicle's performance, fuel economy, and environmental compliance.
In this comprehensive guide, we'll peel back the layers of the P0135 code. We’ll explain what it means, illuminate the critical role of the oxygen sensor heater circuit, delve into the most common culprits behind this code, and walk you through practical, at-home diagnostic steps. We’ll also cover realistic repair costs, empowering you to tackle this issue confidently and keep your car running efficiently for miles to come.
Decoding the P0135: What Your Car is Trying to Tell You
The P0135 code, formally known as "O2 Sensor Heater Circuit Malfunction (Bank 1, Sensor 1)," is a generic powertrain diagnostic trouble code (DTC) applicable to all OBD-II compliant vehicles. Let's break down each element of this code to fully grasp its meaning:
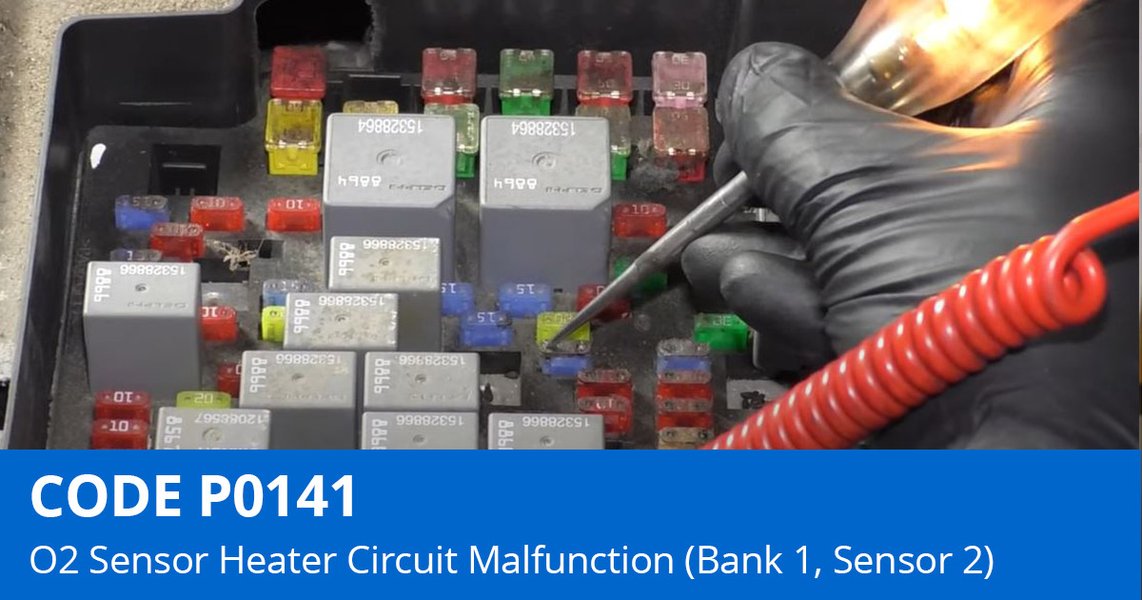
An oxygen sensor, a crucial component in your vehicle's exhaust system.
O2 Sensor: The Air-Fuel Maestro
The oxygen (O2) sensor is a vital component located in your vehicle's exhaust system. Its primary function is to measure the amount of oxygen in the exhaust gases. This information is then relayed to the engine's computer, often called the Engine Control Module (ECM) or Powertrain Control Module (PCM). Based on these readings, the ECM fine-tunes the air-fuel mixture entering the engine to ensure optimal combustion.
Heater Circuit: The Warm-Up Actuator
Modern oxygen sensors incorporate a small electrical heating element. This "heater circuit" is designed to rapidly bring the sensor to its optimal operating temperature. An oxygen sensor functions most accurately at high temperatures, typically between 600-750°F (315-400°C). Without this heater, it would take several minutes for the exhaust gases alone to warm up the sensor, especially during cold starts.
Bank 1: Identifying the Engine Side
In vehicles with multiple cylinder banks (like V6 or V8 engines), "Bank 1" refers to the side of the engine that contains cylinder number one. For inline engines, which typically have only one bank, that bank is designated as Bank 1. This distinction is crucial for identifying the correct sensor in multi-sensor setups.
Sensor 1: The Upstream Sentinel
"Sensor 1" indicates the upstream oxygen sensor, which is positioned before the catalytic converter in the exhaust stream. This sensor is the primary feedback mechanism for the ECM, providing real-time data that dictates the engine's fuel mixture adjustments. In contrast, "Sensor 2" refers to the downstream sensor, located after the catalytic converter, which monitors the catalytic converter's efficiency.
In essence, the P0135 code tells you that the engine's computer has detected an electrical problem within the heating element of the oxygen sensor located just before the catalytic converter on the first bank of cylinders.
Why the O2 Sensor Heater Circuit is Indispensable
You might wonder why a small heating element within an O2 sensor is so critical. Its rapid heating function significantly impacts your vehicle's overall performance, fuel economy, and environmental footprint:
- Swift Entry into Closed-Loop Operation: Without the heater, the O2 sensor would remain "cold" and inactive for a longer period after startup. During this time, the engine operates in "open-loop" mode, relying on pre-programmed settings and often running a richer fuel mixture. The heater rapidly warms the sensor, allowing the ECM to switch to "closed-loop" operation much faster. In closed-loop, the ECM uses the O2 sensor's precise feedback to constantly adjust the air-fuel ratio for optimal efficiency.
- Enhanced Fuel Efficiency: A prolonged open-loop operation due to a faulty heater circuit means the engine consumes more fuel than necessary. By enabling a quicker transition to closed-loop, the heater circuit helps your vehicle achieve better fuel economy, potentially preventing a 10-15% reduction in MPG.
- Reduced Emissions: A rich air-fuel mixture also leads to higher emissions of harmful pollutants. A functioning heater circuit ensures that the O2 sensor can accurately regulate the mixture from the moment you start your drive, significantly reducing cold-start emissions and helping your vehicle pass emissions tests.
- Protecting the Catalytic Converter: A consistently rich fuel mixture can introduce excessive unburnt fuel into the catalytic converter. This can lead to the converter overheating and premature failure, which is a very expensive repair. The heater circuit indirectly protects this vital emissions control component.
"The O2 sensor's heater circuit might seem like a small detail, but its failure can have a cascade effect on your vehicle's fuel economy, emissions, and even the lifespan of your catalytic converter."
Symptoms: What to Expect When P0135 Appears
One of the peculiar aspects of the P0135 code is that it often doesn't present dramatic drivability symptoms. Your car might still feel and drive relatively normally, which can lead some drivers to underestimate the importance of fixing it. However, ignoring this code can lead to several undesirable consequences:
- Illuminated Check Engine Light: This is the most consistent and immediate symptom. As soon as the ECM detects a heater circuit malfunction, it triggers the check engine light on your dashboard.
- Decreased Fuel Economy: As explained, a non-functional heater means the engine runs rich for longer. This directly translates to lower miles per gallon and more frequent trips to the gas station.
- Increased Emissions: The rich fuel mixture results in higher levels of pollutants exiting the exhaust. This can cause your vehicle to fail emissions inspections.
- Subtle Performance Issues (Less Common): While not always noticeable, some drivers might report a slightly rough idle during warm-up or a minor hesitation during acceleration, especially if the O2 sensor is struggling to provide any accurate data.
- Potential for Other Codes: A persistent P0135 can sometimes lead to other related codes over time, such as those indicating a rich fuel condition (e.g., P0172/P0175) or even catalytic converter inefficiency (P0420).
Common Culprits: Why Your O2 Sensor Heater Circuit Fails
The P0135 code primarily signals an electrical issue within the heater circuit of the Bank 1, Sensor 1 oxygen sensor. Pinpointing the exact cause is crucial for an effective repair. Here are the most frequent reasons this code appears:
1. Failed Heater Element within the O2 Sensor
This is overwhelmingly the most common cause. Over time and extensive use (typically after 60,000-100,000 miles), the internal heating element within the oxygen sensor can burn out, break, or develop excessive resistance. When this happens, the ECM detects that the heater isn't drawing the correct amount of current or isn't heating up as expected, thus triggering the P0135 code. The sensor might still function to measure oxygen once it gets hot, but its crucial warm-up capability is compromised.
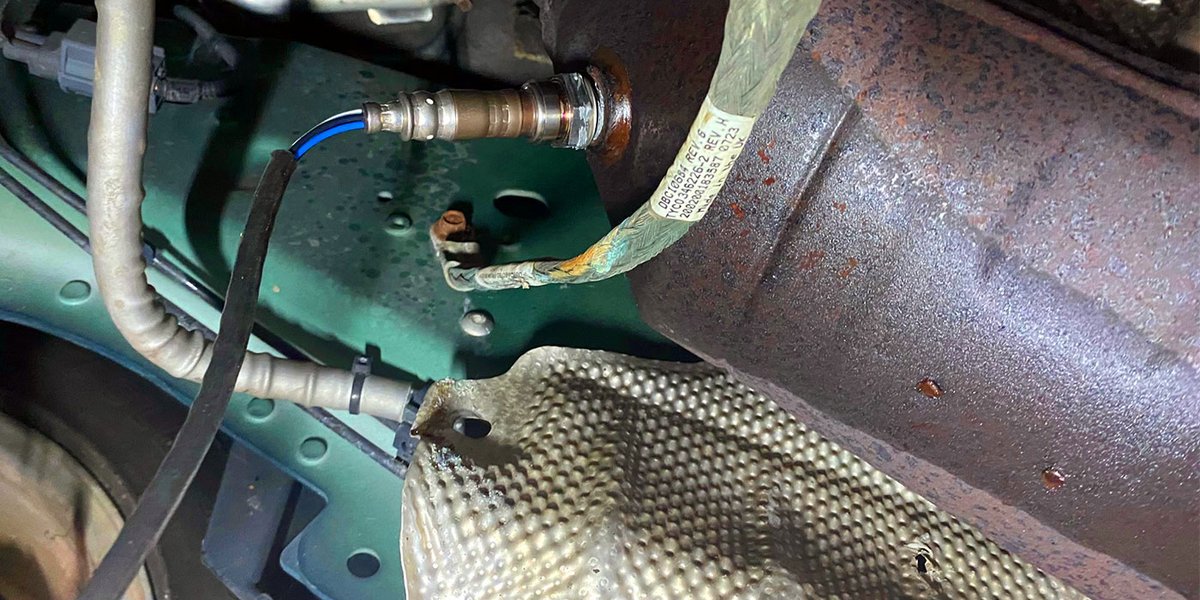
A typical oxygen sensor with its electrical connector and heater wires.
2. Blown Fuse
The heater circuit of the oxygen sensor is protected by a fuse (often a 5-15 amp fuse). If this fuse blows, the sensor's heater will lose power, leading to the P0135 code. A blown fuse is often the easiest and cheapest fix, but it's important to consider why it blew. A short circuit elsewhere in the wiring could be the underlying cause, and simply replacing the fuse without addressing the short will likely result in another blown fuse.
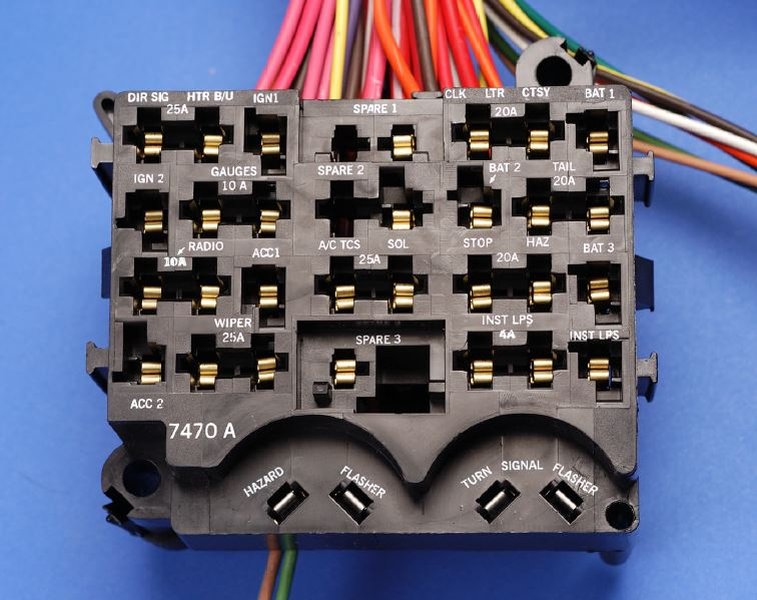
A typical automotive fuse box, where O2 sensor heater fuses might be located.
3. Damaged Wiring or Connections
The oxygen sensor's wiring harness and connector are subjected to harsh conditions, including extreme heat, vibration, and exposure to road debris and moisture. This can lead to various forms of damage:
- Frayed or Broken Wires: Wires can fray, get pinched, or break due to heat, rubbing against components, or even rodent damage.
- Corroded Pins or Connectors: Moisture, dirt, or road salt can cause corrosion on the electrical pins within the sensor's connector, interrupting the flow of electricity to the heater.
- Loose Connections: The connector itself can become loose or its terminals can spread, leading to an intermittent or complete loss of connection.
- Short Circuits: A short to ground or power in the wiring can cause the fuse to blow or directly trigger the P0135 code.
4. Faulty Engine Control Module (ECM/PCM)
While less common, a malfunctioning ECM or PCM can sometimes be the culprit. The ECM is responsible for supplying power and controlling the heater circuit. If its internal "heater driver circuit" fails, it won't be able to send the necessary power to the sensor, resulting in a P0135 code. This diagnosis is usually considered only after all other more common causes have been thoroughly ruled out.
Important Note: The P0135 code specifically indicates a problem with the heater circuit, not necessarily the sensor's ability to measure oxygen. However, a non-functional heater means the sensor cannot operate optimally, especially during initial startup.
DIY Diagnosis: Step-by-Step Troubleshooting for P0135
Before you rush to replace parts, performing some basic diagnostic steps at home can help you accurately identify the root cause of the P0135 code and potentially save you significant money. You'll need an OBD-II scanner to read and clear codes, and a digital multimeter for electrical testing. Always prioritize safety: ensure the engine and exhaust are cool before starting any work.
Tools You'll Need:
- OBD-II scanner
- Digital multimeter (capable of measuring voltage and resistance)
- Basic hand tools (wrenches, pliers)
- Optional: O2 sensor socket (if replacement is likely)
- Vehicle-specific service manual or wiring diagrams (for fuse locations, wire colors, and resistance specifications)
Step 1: Confirm the Code and Inspect for Others
Begin by using your OBD-II scanner to confirm the presence of the P0135 code. While you're at it, check for any other related codes. Sometimes, a P0135 might be accompanied by codes indicating a rich condition (P0172) or even catalytic converter inefficiency (P0420). Note down any "freeze-frame data" your scanner provides, as this captures engine parameters at the moment the code was set, which can be useful for diagnostics. After recording, clear the codes, take a short drive, and see if P0135 reappears. This helps confirm it's an active issue.
Step 2: Visual Inspection of Wiring and Connector
Locate the Bank 1, Sensor 1 oxygen sensor. This is the one before the catalytic converter on the side of the engine with cylinder #1. Visually inspect the wiring harness leading to the sensor and its electrical connector for any signs of damage:
- Look for frayed, burnt, or chewed wires.
- Check for melted insulation, especially where wires might touch hot exhaust components.
- Examine the connector for corrosion (green or white buildup), bent pins, or a loose fit.
- Ensure the connector is securely clipped together.
If you find any obvious damage, a repair of the wiring or connector might be all that's needed. Ensure any repairs use heat-resistant wiring and proper electrical connectors.
Step 3: Check the O2 Sensor Heater Fuse
Consult your vehicle's owner's manual or a service diagram to locate the fuse box (usually under the hood or under the dashboard) and identify the specific fuse for the O2 sensor heater circuit.
- Use a fuse tester or visually inspect the fuse. A blown fuse will have a broken wire filament inside.
- If the fuse is blown, replace it with a new one of the exact same amperage rating.
- If the new fuse blows immediately, this strongly suggests a short circuit in the wiring or within the O2 sensor itself. You'll need to investigate further before replacing the sensor.
Step 4: Perform a Resistance Test on the O2 Sensor Heater Element
This test determines if the heater element inside the O2 sensor is functioning correctly.
- Disconnect the O2 Sensor Connector: Ensure the sensor's electrical connector is unplugged from the vehicle's harness.
- Identify Heater Wires: Most 4-wire oxygen sensors have two wires dedicated to the heater circuit. These are often the same color (e.g., two white wires) or are of a heavier gauge. Refer to your service manual for exact wire identification for your specific vehicle.
- Set Multimeter to Ohms (Ω): Set your digital multimeter to the lowest resistance setting (e.g., 200 ohms).
- Measure Resistance: Touch the multimeter probes to the two heater terminals within the O2 sensor's connector (the part still attached to the sensor, not the vehicle harness).
- Interpret Readings:
- A healthy O2 sensor heater typically shows a low resistance, usually between 0.9 and 14 ohms when cold. This specification can vary significantly by manufacturer and sensor type, so always check your vehicle's service manual for the precise range.
- An "open circuit" reading (often displayed as "OL" or infinite resistance) indicates that the heating element is broken or burned out. The sensor needs to be replaced.
- A reading of very low or near-zero resistance could indicate a shorted heater element, also necessitating sensor replacement.
Pro Tip: Always compare your measured resistance to your vehicle's specific service manual specifications. Generic ranges are a good starting point but may not be perfectly accurate for every make and model.
Step 5: Check Voltage Supply at the Connector (If Fuse is Good)
If the fuse is good, and your wiring appears intact, you need to verify that power is reaching the O2 sensor connector.
- Key ON, Engine OFF: Turn the ignition to the "ON" position (do not start the engine). For some vehicles, the heater circuit may only activate with the engine running.
- Back-probe the Connector: With the O2 sensor still disconnected from the vehicle's harness, carefully back-probe the vehicle's harness connector (the side that normally plugs into the sensor). Identify the heater power and ground wires (again, refer to your service manual).
- Measure Voltage: Set your multimeter to measure DC Volts. Place one probe on the heater power wire and the other on a good chassis ground or the heater ground wire. You should typically see around 12 volts (battery voltage) if the heater circuit is receiving power.
- Interpret Readings:
- If you see 12V, the power supply to the heater circuit is likely good, and the problem is probably the O2 sensor itself.
- If you see no voltage, there's a problem with the power supply, which could be a wiring issue further upstream, a faulty relay, or (rarely) an ECM problem.
If you've completed these steps and are still unsure about the exact cause, or if you're uncomfortable with electrical testing, it's always best to consult a certified mechanic.
Repairing P0135: Costs and Options
Once you've diagnosed the root cause of your P0135 code, the next step is repair. The cost can vary widely depending on the specific issue and whether you perform the repair yourself or enlist professional help.
DIY vs. Professional Repair
- DIY Approach: Many P0135 repairs, especially fuse replacement or O2 sensor swaps, are manageable for those with some mechanical experience and the right tools. The main advantage is significant cost savings on labor. However, be prepared for potential challenges like seized sensors or complex electrical diagnostics.
- Professional Service: A certified mechanic offers expertise, specialized diagnostic tools, and typically a warranty on parts and labor. This is often the best choice for complex electrical issues or if you're uncomfortable working on your vehicle. The primary drawback is higher overall cost due to labor charges.
Realistic Repair Cost Ranges (As of 2026)
The following table outlines typical cost ranges for P0135 repairs, covering parts and labor estimates:
| Repair Item | DIY Cost (Parts Only) | Professional Cost (Parts & Labor) | Notes |
|---|---|---|---|
| Fuse Replacement | $2 - $15 | $30 - $70 | An inexpensive fix, but identify why the fuse blew. |
| Wiring Repair | $10 - $50 | $75 - $150 | Cost depends on the extent of damage; includes materials and labor. |
| Aftermarket O2 Sensor (Bank 1, Sensor 1) | $40 - $180 | $150 - $350 | Prices vary by vehicle, brand, and type (universal vs. direct-fit). |
| OEM O2 Sensor (Bank 1, Sensor 1) | $90 - $280+ | $220 - $480+ | Original Equipment Manufacturer sensors are generally more reliable but pricier. |
| Professional Diagnosis (if no repair is done) | N/A | $80 - $160 | Often waived if the repair is performed at the same shop. |
| ECM/PCM Replacement | $200 - $600+ (for used/remanufactured) | $600 - $1800+ (plus programming) | Rare and expensive; only considered after ruling out all other causes. |
Overall, professional repair costs for fixing a P0135 code, typically involving an O2 sensor replacement, generally range from $150 to $450. More complex installations or certain high-end vehicles might push this figure higher. Always obtain a detailed quote before authorizing any work.
After the Repair: Clearing Codes and Test Driving
Once you've completed the repair, whether it's a simple fuse swap or a sensor replacement, follow these steps:
- Clear the P0135 Code: Use your OBD-II scanner to clear the stored trouble code from your vehicle's computer. Alternatively, disconnecting the car battery for about 15 minutes can reset the ECM, but this might erase other learned settings.
- Test Drive Your Vehicle: Drive your car under various conditions, including cold starts, city driving, and highway speeds. Pay close attention to how the car performs.
- Re-scan for Codes: After a few "drive cycles" (which typically involve a cold start, some driving, and engine shutdown), re-scan your vehicle to ensure the P0135 code doesn't return. If it does, there might be an underlying issue that wasn't fully resolved, or the initial diagnosis was incorrect.
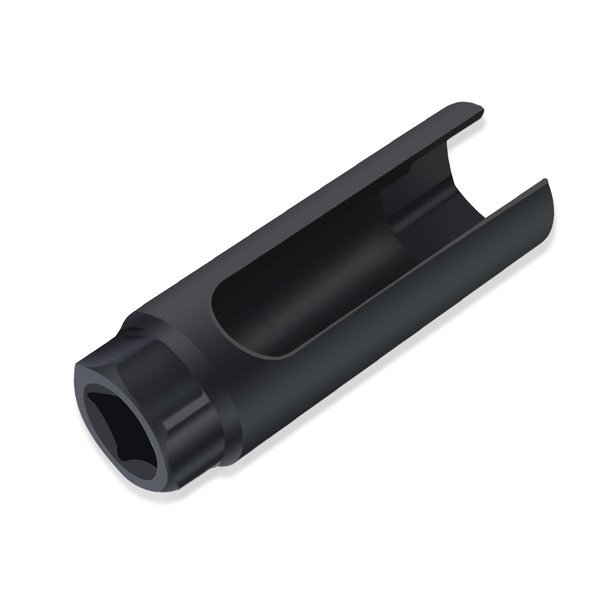
An oxygen sensor socket, a specialized tool for easier sensor removal and installation.
Can You Safely Drive with a P0135 Code?
Generally, you can drive your vehicle with a P0135 code for a short period without it leaving you stranded. This code is usually considered of "moderate" severity. However, driving with an active P0135 code for an extended duration is not recommended due to several factors:
- Wasted Fuel: The engine will continue to run rich for longer periods, costing you money at the pump through reduced fuel efficiency.
- Environmental Impact: Your vehicle will emit more pollutants, contributing to air quality issues and potentially failing emissions tests.
- Long-Term Damage Risk: A persistently rich air-fuel mixture can lead to premature degradation and failure of the catalytic converter, a very expensive component to replace (often over $1,000).
- Subtle Performance Degradation: While not always obvious, the engine may not run as smoothly or efficiently as it should, potentially leading to slight hesitation or a less responsive throttle.
It's best to address the P0135 code within a week or two of its appearance to prevent these adverse effects and maintain your vehicle's overall health and longevity.
Prevention and Maintenance Tips
While oxygen sensors are wear-and-tear items that eventually fail, you can extend their lifespan and prevent premature heater circuit issues with these practices:
- Address Engine Leaks Promptly: Oil, coolant, or other fluid leaks can contaminate oxygen sensors, leading to premature failure. Fix leaks as soon as they are detected.
- Maintain Proper Engine Health: Ensure your engine receives regular tune-ups, oil changes, and maintenance to prevent conditions that can prematurely age sensors.
- Protect Wiring: Ensure all wiring harnesses, especially those near the exhaust, are properly secured and protected from heat and abrasion. Check for intact heat shields.
- Use Quality Fuel: Consistent use of quality fuel can help maintain engine cleanliness and the longevity of emissions components.
- Choose Quality Replacement Parts: When replacing an O2 sensor, opt for OEM (Original Equipment Manufacturer) or high-quality OE-equivalent aftermarket sensors. Cheaper, generic sensors may not meet specifications and can lead to recurring issues.
Frequently Asked Questions (FAQ)
Conclusion
The P0135 code, signaling an "O2 Sensor Heater Circuit Malfunction (Bank 1, Sensor 1)," is a common automotive issue that, despite often lacking immediate dramatic symptoms, demands your prompt attention. Understanding its meaning, the vital role of the O2 sensor heater in ensuring optimal fuel efficiency and low emissions, and the common causes like a failed sensor, a blown fuse, or damaged wiring, empowers you to diagnose and address the problem effectively.
Whether you choose a DIY repair or consult a professional, resolving the P0135 code will restore your vehicle's optimal fuel efficiency, reduce harmful emissions, and proactively prevent potentially more costly repairs to components like the catalytic converter in the future. Don't let that check engine light linger – take action, and ensure your vehicle runs smoothly, efficiently, and responsibly.
